Showing posts with label Money Pit. Show all posts

Tuesday, March 22, 2011

Looking for Rainbows

The past two days we have experienced rain, high winds and hail.  This morning, as you can see from the photo the clouds over the ocean were dark but we got a rainbow right in front of the back patio!  After all the depressing news from Japan, the suffering of the people, the loss of life and heroic efforts of those in the nuclear plants, I needed a rainbow to brighten the day. 

As we enter week 4 of the Money Pit, things are moving along....Cabinets and hardware were delivered on Monday and installed. 

Linen cabinet and my vanity
lights are in
Shower waiting for glass doors
Dr C's vanity on the right
Loving the glass tile
That hole will soon have a Toto toilet on it!
Kids' Bathroom cabinets are in with hardware


Tomorrow the shower doors in the Master bath will go in and mirrors in the kids' bathroom will be installed.  Thursday is the big day, with the quartzite, granite and plumbing fixtures all hooked up.  I may just get to take a shower here before I leave for a teaching trip on Saturday.

Since the parade of workers continues, I've been making new muffins each morning; my designer says that they are all too comfortable here, since I've been providing food since we started--she's afraid they won't leave! 
Tonight I made some muffins that I love, and am hoping the crew will enjoy; they are the best of Hawaiiana....pineapple, coconut, macadamia nuts, and a cream cheese surprise in the middle....these will wake you up in the morning!

Pineapple Stuffed Macadamia Nut Muffins
Makes 12
For the filling
1 tablespoons sugar
One 8-ounce package of cream cheese, at room temperature
One 8-ounce can crushed pineapple, drained
  1. In a food processor, or electric mixer, beat the filling ingredients together, and transfer to a small bowl, while you make the batter.

 Macadamia Nut Muffin Batter
10 tablespoons unsalted butter, at room temperature
1 cup sugar
2 large eggs
1 tablespoon vanilla paste or extract
1/4 cup milk
2 cups cake flour
1/2 teaspoon baking powder
1/2 cup chopped macadamia nuts
1/2 cups shredded coconut

Preheat the oven to 350 degrees and line 12 muffin cups with cupcake liners, or coat with non-stick cooking spray.

In the same bowl of the food processor or electric mixer, cream together the butter and sugar, add the eggs, vanilla and milk, blending until smooth.  Add the remaining ingredients, and beat until combined.

Using a large portion scoop batter into the muffin tins.  

 Using a teaspoon, or small scoop, top the batter with some of the cream cheese mixture.   

 Top the cream cheese with more of the muffin batter


 Sprinkle with additional chopped macadamia nuts, or coconut if desired and bake for 25 minutes until golden brown and a skewer inserted into the center comes out clean.  Cool completely before serving. 


I hope you've had a great day, and that you see a rainbow this week, too.

Friday, March 11, 2011

Tsunamis, Cake Wrecks, March Madness and Money Pits

This was the scene from our back patio about 8:30 this morning; about the time they were predicting the tsunami would hit here in San Diego.  It is hard to think that what happened in Japan could repeat itself here on this tranquil morning.  Text messages and e-mails pouring in from concerned friends filled my Blackberry, and I had no idea what was happening until I turned on the television and saw the devastation in Japan.  I am mourning this evening for all those who were lost, or who lost loved ones.
Not that I want to compartmentalize, and forget what happened today...it's just that I'm one of those people who takes it all in and I can get swallowed up in the sadness and destruction...I got a wake up call though...feeling rather smug, and I'm thinking I'm the best cook on the planet, I went about making my famous orange cake, and took it out of the pan at the requisite 10 minutes that I timed precisely and here's the CAKE WRECK
EEEEWWWW!!!   Half of it stuck to the pan---and then I thought, hmmm,  maybe I'll cover it up with some glaze---a worse idea---now, it tastes amazing, it's just not much to look at!  Even professionals can have a bad day and this one made me laugh.  My mom always said, don't make fun of others, it's gonna come home to roost----guess what??  I'd made a few snarky comments about Sandra Lee, and I'm sure this was one of her gremlins playing with me!  I actually make cakes from scratch, Sandra finds disgusting processed ingredients to put into her foods.

BUT, I redeemed myself, this time I actually coated the pan with several layers of Bakers' Joy (which I'd been too lazy to get off the top shelf with the orange cake) and baked up a Banana Cake
Doesn't get much better than this!!  So a little redemption along with the humbling orange cake.

Which brings me to March Madness.  I am an avowed college basketball fanatic and this is my time of the year!  I love the kids, the coaches, and the games.  I grew up in Boston with a dad who had tickets to most of the sporting events there, and so I can talk trash with the best of you....My son is a sports writer, and game days/nights around here are filled with lots of loud cheering, and moaning (yes, IU, I'm talking to you!)  Selection Sunday is coming up and I'll be right there, filling out my brackets. 

Week three is closing at the Money Pit, although Pedro and the boys will be back tomorrow to grout.

The shower is ready for grouting, and as you can see the glass tile is in and it looks awesome!  On the left side of the shower is a niche where we can put shampoo, but Dr. C. was sure we would put a small flat screen in there!

I hope you enjoy your weekend, I'm planning to figure out what I can do to help out with relief efforts in Japan, I'll be back on Monday and let you know what I found.  Until then, hug the one you're with. 

Tuesday, March 8, 2011

One Classy Chick

If you have read this blog, you know chicken isn't my favorite, but tonight I decided that it was time to try it again.  What you see is Chicken Marsala with roasted asparagus and golden beets in Balsamic vinaigrette.  Not a bad dinner to put together in 30 minutes. 
Chicken Marsala
Serves 2


2 tablespoons unsalted butter
1 tablespoon extra virgin olive oil
2 chicken breast halves, skin and bones removed
salt and pepper
4 sage leaves, finely sliced
2 shallots, finely chopped
1/4 pound sliced mushrooms
1/4 cup Marsala
1/4 cup heavy cream
2 tablespoons finely chopped Italian parsley

In a medium skillet, melt the butter with the oil over medium high heat.


Sprinkle the chicken with salt and pepper, and brown the chicken on both sides.


Remove the chicken to a plate, add the shallots and mushrooms to the pan, and saute for 5 minutes until the mushrooms begin to color and the shallots are softened. 


Add the Marsala and bring to a boil. 


Return the chicken to the pan, pour in the cream, cover and simmer for 12 to 15 minutes, until the chicken is cooked through.  Stir the parsley into the sauce, and serve the chicken.


 This is great party dish---multiply it as many times as you'd like, and make it ahead of time.  Transfer to a baking dish, cover and rewarm in a 350 degree oven for 10 minutes. 


As we close out week three day 2 at the Money Pit, the shower is looking close to being done---and the glass tile in the WC is all finished. 


They have said we'll be done with the tiling tomorrow and grouting on Thursday---I had a mini-melt down today--my first---nothing major I just needed to get out of Dodge for most of the day---A cup of tea and a few cookies and I'm a lot better! 

I hope you had a great Tuesday---I'll be back tomorrow, till then thank the women in your life, it's the International Day for Women!

Monday, March 7, 2011

Keeping Up to Date

As week three begins in the Money Pit, we are seeing lots of progress, although the tile design in the Master bathroom is intricate, so there is a lot of sawing and cutting going on.  Pictured above is some date nut bread I made this morning from dates that I picked up at Specialty Produce last week.  Date nut bread is one of those old recipes that we never seem to make anymore, and yet, it's a lovely quick bread to serve with coffee or tea.  This one is flavored with orange juice, and it's terrific---especially if you could see that the remains are a few crumbs on the counter! 

Santee Date Nut Bread
Makes One 9 by 5-inch loaf (I used a mini bundt pan with 4 little bundts which worked perfectly)


1 cup orange juice heated 
2 cups dates, pitted and coarsely chopped (see note)
1 teaspoon baking soda
2/3 cup buttermilk
3/4 cup firmly packed light brown sugar
6 tablespoons unsalted butter, melted
1 large egg
2 cups all-purpose flour
1 teaspoon baking powder
1/4 teaspoon salt
1 cup chopped pecans or walnuts


  1. Coat the inside of a 9-by-5-inch loaf pan with non-stick cooking spray.  Preheat the oven to 350 degrees.  
  2. In a large mixing bowl, pour the orange juice over the dates and stir in the baking soda.  Set aside to soften the dates.
  3. In the large bowl of an electric mixer, beat together the buttermilk, sugar, butter and egg.  
  4. Pour in the flour, baking powder, salt, nuts, and the reserved orange juice/date mixture.  
  5. Beat until the mixture is well combined.  Transfer the batter into prepared pan, smooth the top and bake for 55 to 60 minutes until a skewer inserted into the center comes out clean.  
  6. Cool in the pan for 10 minutes, then remove and transfer to a wire rack and cool one hour before serving.  The loaf can be stored airtight in the refrigerator for up to 3 days, or frozen for up to 2 months.  
  7. To make cutting the dates easier, spray the blade of your knife with non-stick cooking spray.
Date Nut bread is terrific served with whipped cream cheese, and honey or honey butter.  


 This is the shower after Saturday.  

 I can't wait for this to be done!

 There is tile on the floor!!! The seat also has tile!

 Molding is in the WC room!  We are going to have to figure out what color to paint the walls soon---should be fun.  

I hope you had a great weekend, I'll be back tomorrow with some thoughts on food and community---until then enjoy your evening. 

Monday, February 28, 2011

Week 2 in the Money Pit

I wish I could show you the video of this amazing Toto toilet --- yes, I've been reduced to extolling the virtues of toilets--that's what this renovation has done to me!  This weekend, two toilets were installed, but as you can see in this bathroom, we are still waiting for cabinetry.  And.......drum roll.....
Tile in the master bath!!
It's going together really well---and the boys work hard all day long.  Today, more tile and dry wall skim coats. 
Lest you think I've been slacking, I've been putting together recipes for the classes I will teach when I go on the road in March.  I also have a recipe that I've been wanting to try for a while, and tweaked it up a bit, so that I can take it down to the elves at Specialty Produce tomorrow. 

These cuties taste as delicious as they look!  Salted peanut, peanut butter, chocolate cookies with milk chocolate chips.  The whole, sweet, salty, and chocolate thing, is awesome, and I always feel like cookies don't count in the calorie department.  Got Milk???

Salted Peanut, Peanut Butter Chocolate Cookies
Makes 36

1/2 cup unsalted butter, softened
3/4 cup creamy peanut butter (use a regular peanut butter, not a "natural" peanut butter)
1 cup sugar
2 large eggs
2 teaspoons vanilla paste or vanilla extract
1 1/4 cups all-purpose flour
1/2 cup cocoa powder
1/2 teaspoon baking soda
1 teaspoon baking powder
1/2 teaspoon salt
1/2 cup salted roasted peanuts
1 cup milk chocolate chips, or chopped milk chocolate
  1. Preheat the oven to 350 degrees and line 3 baking sheets with parchment or silicone baking liners.  
  2. In the large bowl of an electric mixer fitted with the paddle attachment, cream together the butter, peanut butter, and sugar, until smooth.  
  3. Add the eggs one at a time, beating after each addition.  
  4. Add the vanilla, flour, cocoa, soda, powder, salt, peanuts and chips, beating until blended.  using a portion scoop, form 1-inch balls and drop the dough 2 inches apart on the prepared baking sheets.  
  5. Bake the cookies for 10 to 12 minutes, until the edges are firm.  Transfer to a wire rack and cool for 2 minutes, before removing from the cookie sheets to cool completely. 
 There will be more tile work going on tomorrow, and maybe some paint!  I'll be back with updates and a recipe or two throughout the week.  Enjoy your day! 

Wednesday, February 23, 2011

Designing Woman

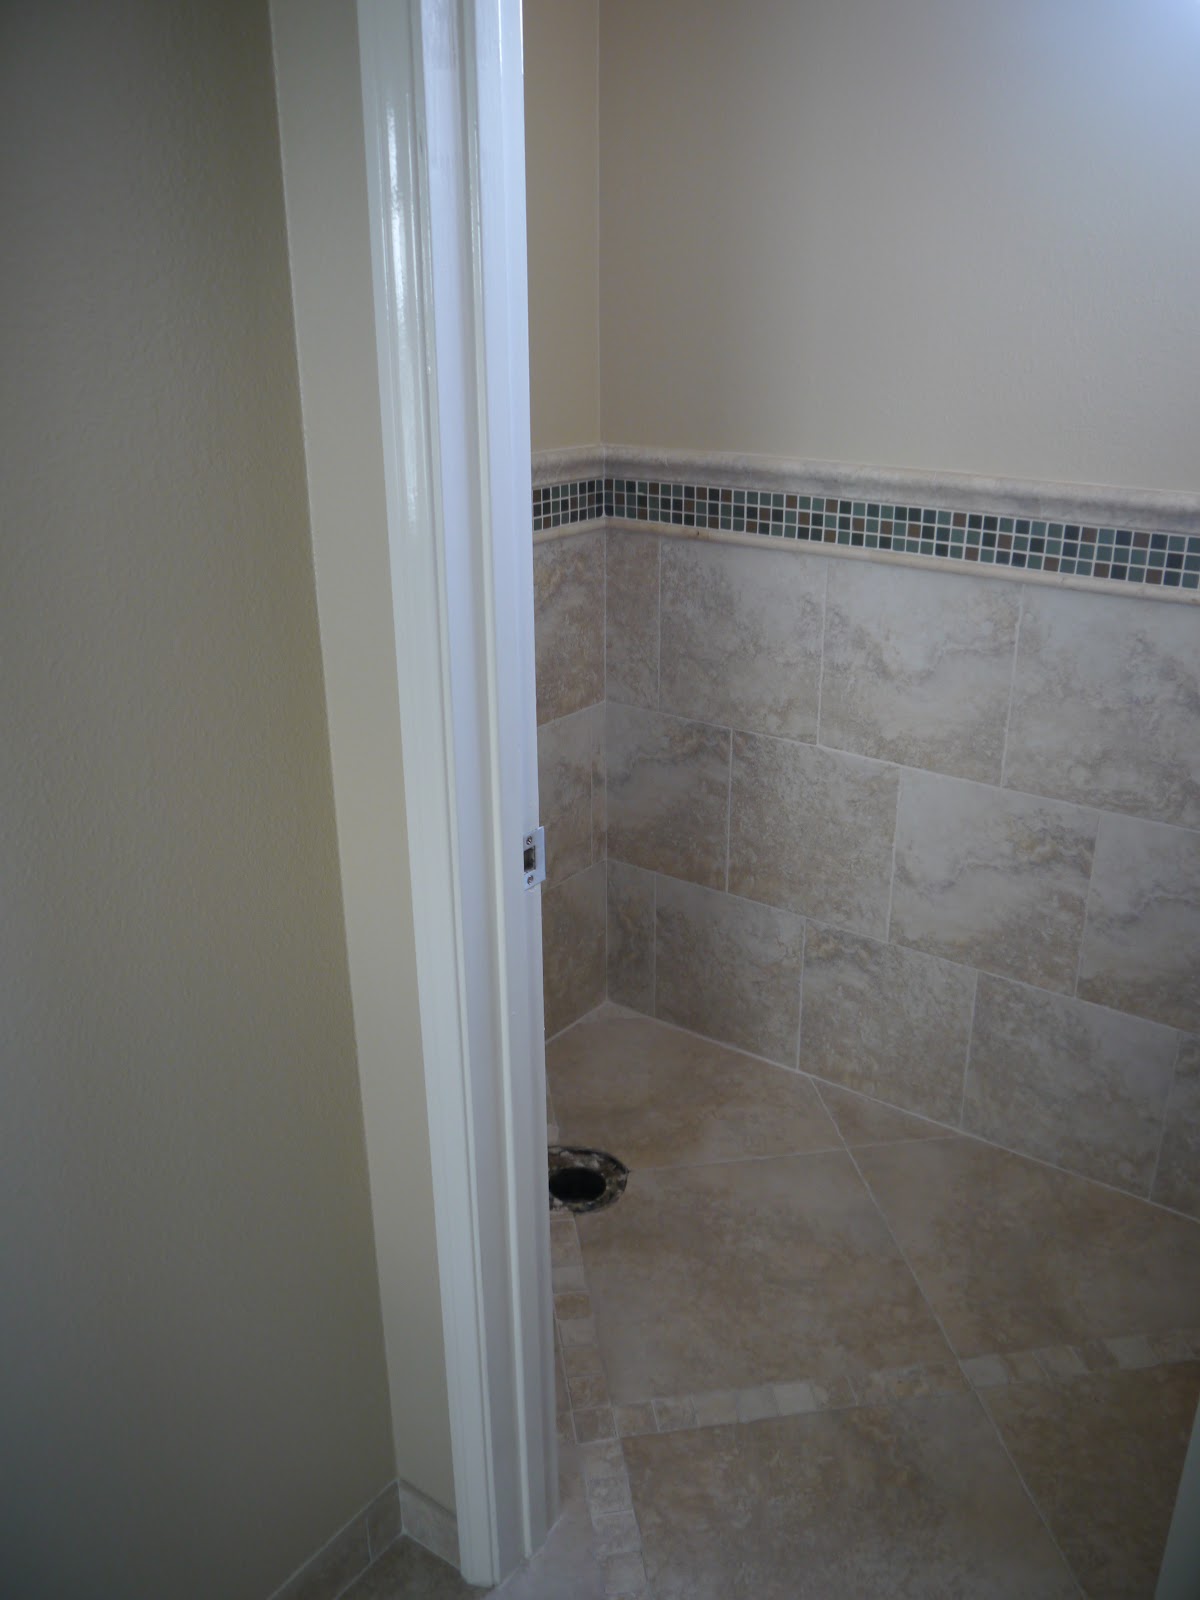
 As we close out day three at the Money Pit, I can tell you that the walls are dry (a good thing) and that framing and some dry wall has happened at Chez Phillips.
Today I went with my designer (the first one I've ever liked and there have been a parade of them) to look at mirrors for the vanities; I think the reason I love Jane (JMJ Design, San Diego) is that when she shows me something and hears the sharp intake of my breath when she tells me the price, she says something sweet like, "or we can go with this option---it's simple and classic!"---I love it when I don't have to feel cheap just because I can't fathom spending $5,000 on a toilet.

 yes, indeed, some toilets (I'm talking to you Villeroy and Bach) can be over $5000--we opted for the Toto brand from Japan with the "whisper close seat"--I'm not kidding, it says it on the box!  When I went shopping for toilets, there was one that would open and close every time you went by it---thought that was little too weird for us!


So, as I've been looking at design elements, I had a friend e-mail me and ask if I would talk about kitchen renovations, and so that's what this post is all about.  We remodeled our kitchen about 12 years ago, and I still love it, the layout, the cabinets, the counter tops and the appliances (although some of the appliances have come and gone due to wear and tear--I tend to abuse them!)

My first piece of advice, is to be prepared for sticker shock, everything will cost more than you think.  If  you want to save a bit of money, do some of the work (that you are absolutely qualified to do) yourself--if you have never installed cabinets, or done wiring, or plumbing it's worth it to hire professionals.  If you can demo like a Transformer, then do the demo yourself, that can save you some money, although it's back breaking work.

My first bit of advice is to buy quality, but be smart about it.  All your friends may have that $10,000 range that does everything but light their cigars, but they never use it so how are you to know if it's any good or not?  Find something in your price range, and then see if it has the features you want.  Don't fixate on a brand name because chances are a lot of them are made in the same factory as 12 other brands. ( I have a kitchen designer friend who says that he designs some of the most gorgeous back drops for take out food in San Diego county!)

Over half of your budget will be spent on the cabinets; now this is where I draw the line--there are many companies making quality cabinets, and they are half the price of custom made--this doesn't mean that I'm anti-cabinetmaker, it just means that this is where you can save.  Look at the photos below and tell me which is the Ikea cabinet, and which is the custom cabinet.  (I'll let you know at the end)

Ikea is now doing design and installation in some areas, so if you are on a tight budget, the cabinets are well made, and well thought out and the price is Ikea-right!

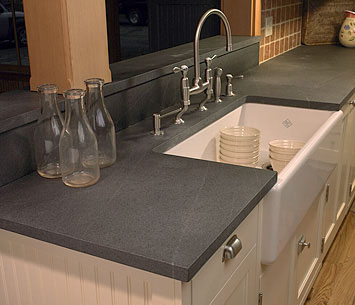
The most important choice as far as I am concerned in a kitchen is the counter tops.  The counter tops will be there forever; you can always change the color of the cabinets, remove the appliances and replace them but the counter tops are a major job and take a while to replace, AND they are expensive.  Think long and hard about the COLOR, not the material.  All the materials there are to choose from have their pluses and minuses, but you have to love the color because you will live with it for a very long time.
Here are a few choices:

Soapstone is gorgeous, gets a worn patina and who could resist that gorgeous sink?

Granite--natural stones are gorgeous because they have so many different colors, and veins that flow throughout the piece.  Granite comes in an huge color palette.

Quartzite is relatively new, and absolutely stunning; something like this will be on the vanities in our master bath room and I am in love.  When I drove into the granite yard to look for granite, this was the first thing I saw, and I did a exorcist head turn as I was driving by--it's magnificent.

Manufactured stone--lots of choices here, the oldest is Corian, but there are many brands, such as Silestone.  These manufactured stones are actually becoming more expensive than granite due to their manufacturing costs.

Fixtures, like sinks, faucets, and soap dispensers should all cost you a bit, because you want them to last.  See if there is a life time guarantee on each one of them, so that if something does go wrong, you have some recourse.  You will get what you pay for here, so I recommend that you buy quality.  On the counter top around the sink, you will have to determine how many holes to have drilled in the stone for you faucet, spray arm (if you go that route) and whether you want soap dispensers built in--I have them and love them.    The one thing that I did do to the counter top at the edge of my sink was have lines routered out for a drain board (they can do this with any solid surface counter top) the dishes that don't go into the dishwasher drain on this and I have no need for a dish drainer to sit on or in the sink.

Appliances:  If the appliances that you have are within 5 years old, I'd probably keep them if you like them.  If you absolutely can't live without an induction cook top, then figure that into your budget.  Some times you can keep your old refrigerator and dishwasher and have cabinet fronts made to match the rest of the cabinets.  Or you could paint the refrigerator with chalkboard, or have an insert made that is chalkboard.  If your energy company is giving rebates for energy efficient and water efficient appliances, this is another good way to save some money should you choose to buy all new appliances. 

Range:   You need to decide if you want an electric cook top (I recommend that you get a glass top if you go this route, just because it's easy to clean) gas, or induction.  Induction is new, and you will need magnetic pots (meaning that the bottom will have to attract a magnet---use a magnet from your fridge to see if they are)  but to me, it's the ideal --- it is instant on like gas, but without the gas.  If you take the pot off the burner it automatically turns off---so it's energy efficient. I love the Fagor Induction burners. Don't let anyone talk you into gas, if you are used to electric, and like it---there is a lot of cachet surrounding gas with chefs insisting on it, but you aren't running a restaurant, this is your home.

For ovens, I recommend self-cleaning electric (much more accurate than gas) with convection.  Convection is great for some things, and not for others---crispy pizza crusts, and pies, and cookies, no drippings with roasts and turkeys.  I have two Dacor electric convection ovens and love them.

Refrigerators:  When I bought my last refrigerator, I was really looking for size rather than side-by-side or freezer on the bottom.  So I went with a gigantic (non-built-in) side by side.  There are lots of choices, but you have to decide what will work for you.  Get one with an ice maker, and if it has filtered water, that is a plus as well, and auto defrost is required, this girl isn't defrosting!  Built in or built in look models are a bit smaller and you have to decide if that will work for you and your family.

Dishwashers:  I have a Bosch dishwasher that will probably be in this house forever; it makes NO noise.  I love it.  It also doesn't have the heating element in the bottom so it uses a lot less energy.


You appliance choices are wide and varied; your budget and layout will determine if you decide to have a trash compacter (I wouldn't be without one) a warming drawer, wine fridge or microwave.

OK, so how to lay it out---many designers talk about the work triangle, but if you plan to stay with the original foot print of your kitchen and not knock out walls, you may have to tailor this to the space.  The triangle means that the sink, stove and fridge are all close enough that you could turn around and be there.  I like smaller rather than larger kitchens---there isn't as much walking around to get things--galley kitchens can be fun and efficient.  Do you need an island or is it just a design element that might be in your way?  Do you have a view that you want to take advantage of?  Put the sink where you can see the view, because you'll be able to see the view while you are doing a chore--not a bad thing.


To save money, try not to move the electrical or plumbing--that will ratchet up the costs.  We were able to rearrange the plumbing  by moving the sink a few feet and adding an "L" with the dishwasher without breaking the bank, since everything was still in the same line.
Corners are usually dead spaces with deep cupboards, that you can never get into to find anything--this is where you put a Lazy Susan so you can see what's on the shelves.  Roll out shelves on bottom cabinets are a must, so you can see what's there.
Many cabinets are specifically purposed, like long narrow pantries that slide out, spice cabinets and bread drawers. Other goodies are bins that tilt out to hold pantry ingredients like flour and sugar.   These can be incorporated into the design but you need to think of all the bells and whistles you want and then give them a priority.

Every magazine and home improvement series will show you the glitz and glamour of  gorgeous kitchens, and their cost estimates are sometimes laughable.  (many things are product placements, and no one pays for them)  If you feel that you aren't capable of re-designing your own kitchen, hire a designer--they can save you money, and time by giving you good advice.  (Ask your friends for a referral)  They can generally recommend licensed contractors and tradespeople.  If you don't want the designer through the entire process, you might just consider hiring them by the hour to do design and give you advice, and possibly shop with you, if you want to do the rest on your own.  My bath remodel has been so stress free because I have Jane here and she's in charge, I just give in-put, but she deals with the trades---I'm blessed.

Feel free to e-mail me through my website diane@dianephillips.com if you have any specific questions, and I'll be in touch.    I'll be back tomorrow with a recipe or two and some more thoughts on renovations.  Enjoy your night!
The first photo was the Ikea kitchen.