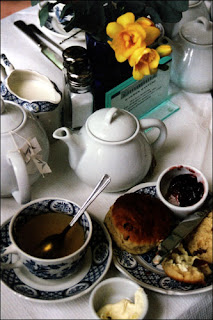
The weather this week has been absurd to say the least; a high of 80 on Sunday, and today it's in the 50's damp and cold, a great day for a cup of tea. I also have a mound of Meyer lemons on the counter, from
Dr. C's resurrection lemon tree, and so decided it was time to go into lemon curd production.
Lemon curd is one of those culinary tools that can be the filling for cakes, an addition to frosting, or a cheesecake, served it with berries, serve it on waffles, pancakes, crepes, or you can slather it on toast or scones. Lemon curd can be frozen and it's great to have in the freezer for a quick dessert -- whip up some heavy cream, and fold it in---you've got mousse! Freeze it and your have heavenly frozen mousse!
Lemon Curd
Makes about 3 cups
1 cup sugar
6 large eggs
1/2 to 2/3 cup fresh lemon juice
1/2 cup (1 stick) butter, cut into 1/2-inch cubes
In a 2-quart saucepan, combine the sugar, eggs, and 1/2 cup of the lemon juice and whisk until smooth.Set over medium heat and continue to whisk until the mixture begins to thicken. This may take about 5 minutes.
Stir in the butter cubes, a bit at a time, and continue to cook, stirring constantly, until the curd is thickened. Taste and add the remaining lemon juice if you like yours would like it more tart. Strain through a fine mesh strainer to deal with any scrambled eggs that might be there. (see note)
Remove from the heat, press a piece of plastic wrap directly against the surface to keep a skin from forming, and let cool to room temperature.
Do-Ahead: At this point, you can refrigerate up to1 week or freeze for up to 2 months. Defrost before continuing.
Variations: Substitute orange or lime juice for the lemon juice, and proceed as directed. Lime curd will be yellow in color, if you want it green, then add a bit of food coloring, but not too much!
Cook's Note: When making a lemon curd, or custard, or any sauce that has eggs, you may end up with scrambled eggs in the bottom of the pan, no matter how careful you are about the heat under the pan. Not to worry, strain the finished sauce through a fine mesh strainer and no one will ever know; it's our secret!
And, it wouldn't be tea time without scones. If you have never had a proper British tea, and the only scones you have tasted have been those hockey pucks from Starbucks, then you should do yourself a favor and make yourself a batch. This recipe makes about 16--but you can freeze half the dough and bake them another time, or you can bake them all and then freeze them. Either way, they are divine, actually that's why they are called heavenly scones!
Heavenly Scones
Makes about 16
3 3/4 cups unbleached all-purpose flour
1 1/2 tablespoons baking powder
1/2 teaspoon salt
1/3 cup sugar
2 1/2 cups heavy cream
2 large egg yolks
2 tablespoons milk or heavy cream
3 tablespoons sugar
Preheat the oven to 400°F., line a baking sheet with a silicone liner, aluminum foil, or parchment paper.
Whisk together the flour, baking powder, salt, and sugar in a large bowl. Stir in the heavy cream and continue stirring until the dough begins to form a rough mass. Turn out the dough onto a lightly floured work surface and knead until smooth, about 6 times. Divide in half and shape into two disks about 3/4 inch thick.
Cut the disks into 8 or 10 wedges each and transfer to the prepared baking sheet.
Do-Ahead: At this point, you can freeze the cut scones. Once they are frozen, transfer to a zipper-top plastic bag, and freeze for up to 2 months, Defrost for 30 minutes before continuing. Or you can refrigerate for up to 2 days before baking.
Whisk together the egg yolks and milk, brush over the tops of the scones, and sprinkle with the sugar. Bake until golden brown, about 20 minutes. Serve warm with jam, lemon curd, clotted cream, and/or soft butter.
I hope you have a lovely day! TTFN!


